Today we’re talking about a unit that doesn’t get much use outside a couple of different maps from a handful of players with a particular love, blowing things up. The Demolition Raft is an underused unit with nearly one million and one uses, maybe not that many but we have seen players come back seconds from defeat using some smart tactics involving well place Demolition Ships. They’re one of our favorite units to talk about and hopefully after a little more information is passed your way you’ll begin to understand why we love them so much and how you can utilize them in your games. We’re going to explore unit itself with a small stat breakdown and the little strategic things you need to know before trying some of these maneuvers for yourself. Don’t believe us on how effective these guys can be? Wait and see.

Demolition Raft – ‘Filled with explosives. Self destructs when used. Pilot near enemy ships and detonate to wrest control of the sea from an entrenched opponent.’
Seems easy enough to use right? Demolition Rafts along with Fire Galleys were introduced with the African Kingdoms expansion in a bid to give you more options during Feudal Age, particularly on heavy water maps. Before this addition Feudal Age water battles consisted only of Galleys until Castle Age was reached, and by then Galleys were massed enough it made any kind of transition next to impossible. Every civilization besides the Koreans have access to Demolition Rafts and should be able to find a way to make use of them, provided you have the information you need. There are a few issues we need to address that come up when we examine the stat block, nothing we can’t get around with some smart decision making and clever tactics.
| Demolition Raft HP: 45 |
|---|
Looking at the above statistics we can see the key issue will be the low HP combined with the low Pierce Armour. Despite Demolition Rafts easily being able to run down Galleys on the water, you do need to be careful or the Galleys will cut through your ships quickly and when micromanaged correctly will come off nearly unscathed. Sailing straight towards your opponent is generally not the best idea, this is where you need to be a little sneaky. Considering it will also take two Demolition Rafts to destroy a Galley we need to consider the cost effectiveness of the scenario. With two Demolition Rafts costing us 140 Wood and 100 Gold we want to try and average at least a 1:1 kill ratio, and that isn’t even a 100% effective trade. Really a 1:2 trade is what you should be aiming for, if you have built three Demolition Rafts the goal should be to destroy at least six Galleys with them. How do you achieve this you may ask? The answer is blast radius. When a Demolition Raft explodes it damages all enemy units within a 2.5 tile radius, you should be aiming for your opponents clumps of Galleys. These clumps appear often due to the formation your opponent will be using, their movement or via the patrol function.

As we learned above, Demolition Rafts are squishy best way to keep your investments safe is to keep them behind you Galleys until the optimum moment to move them out, generally when your opponent clumps up and tried to defend their docks. Keep them well defended and move them in when your opponent is not expecting them, which brings us to their best use, surprise attacks. If your opponent is not looking out for Demolition Rafts, this is where they shine. The amount of damage they can do in seconds wins games and evens playing fields like that. Come in from an angle your opponent isn’t expecting while they’re busy fighting your Galleys and chances are your opponent either won’t notice them, or they’ll be sandwiched between your forces in a pincer movement not allowing them to escape. Once the Demolition Rafts hit, use your Galleys to mop up the leftovers and push forward. Against Fire Galleys however these units are a hard counter. The Fire Galleys require to get in close to attack and the speed of the Demolition Rafts will allow them to easily catch up and detonate, you still need to aim for a higher trade ratio than 1:1 but the mechanics behind Fire Galleys will make it a lot easier.

One of the most common things you’ll see people do on water maps is once they’ve defeated their opponents navy they will push out and attempt to destroy the docks. Destroying the docks cemented their position on the water and forces you to create new docks before you even have the option of trying to take back water. Most players when they move out to destroy docks will clump up around them, which gives you a great defensive option. If you start losing the water fight to a point you believe it’s over, you can always construct some Demolition Rafts and leave them garrisoned for when your opponent comes to destroy your docks. It’s also worth noting that the War Galley upgrade will also upgrade your Demolition Rafts into Demolition Ships, helping them keep stay cost effective and usable in Castle Age and further.
The one thing to not forget is how effective Demolition Rafts are against land units. Galleys have a lot of HP and compared to land units and they can take a hit, Archers with 30HP; say goodnight. Demolition Rafts work even more efficiently against any land units due to their lower HP and tight nit formations. Rivers, shallows and edges of water bodies are all prime locations to take advantage of how much damage you can do in second utilizing the sneaky demo. These plays will always need the element of surprise and some micromanagement to be effective, but the damage you can achieve is insane. Even when you sum up the costs of units it works out wildly effective. Two Archers for one Demolition Raft can be swung as a worthwhile trade, 10 Archers for a Demolition Raft; now we’re talking. Bog Islands is a map where you can really utilizse this strategy, you can checkout our breakdown HERE.

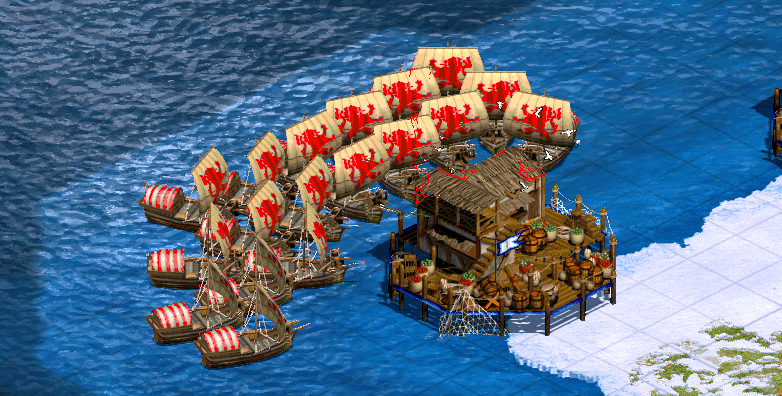
You want to maneuver your Demolition Ships to achieve maximum surface area with their blast radius to clear as many units as possible. Against most land based unit you will find them to be a lot more effective and should be able to get some great trades vs Archers, Skirmishers, Champions and even Knights should you play your cards right. Checkout the images above and below to see an insane demonstration of how powerful they can be. Always look for choke points you can abuse along riverbanks and some careful timing can earn you a major reward and even flip the entire match around. Maps such as Bog Islands, Islands, Rivers, Highland and Sandbank just to name a few are perfect to use some of the above knowledge you’ve gained.

The only other piece of advice we have for you from here is to just stay calm, look for the oppurtunities and sneaky demo.
Do us a favor, we love this stuff! Please link us your favorite Demolition Ship hits in the comments below. Videos, recorded games, we just want to see more of this. Even a good story about how you used 3 Demoships to obliterate 20 War Galleys at minute 24 to win the match, show us what you got!
Good article, good year for everybody
One thing the article really should mention is that you can delete your demo raft and still benefit from it’s attack. Especially on the HD version the pathing can make demo rafts a lot worse, and often deleting at the right moment is more effective than waiting until it explodes by itself.