Bog Islands is a very different map for one key reason, most of the map is made up of Mangrove Shallows; this terrain allows both land and water units to traverse it while also allowing building. The terrain itself raises some interesting questions about how the map should be played, lots of unusual options present themselves due to this feature. Today we’ll take a look at some statistic blocks below, walk you through the way to get the most of your hard earned resources and do our best to get some solid advice out there. First, lets have a look at what your key options are; then discuss your available resources.
‘Small grassy islands lost in a maze of swampy wilderness’
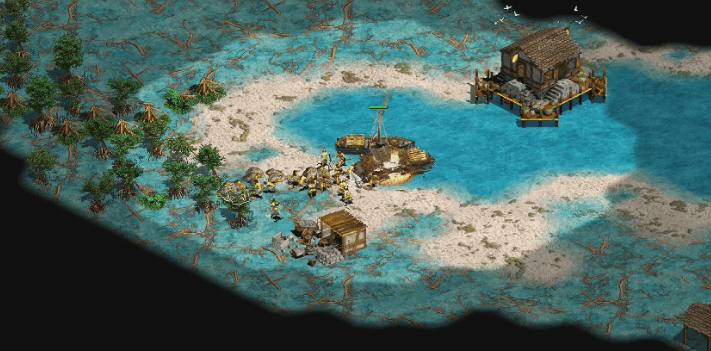
Bog Island gives you a small amount of room to actually build on until you venture out into the Mangrove Shallows. Leaving this starting ‘island’ means your buildings and villagers will be a lot more susceptible to attacks from your opponents navy, which is one of the strongest strategies on this map. Due to the way the map functions ships come into play heavily, they have access to about 90% of the map and their range means they may even be able to hit most of the buildings and units on your starting island.
| Archer HP: 30 | Man-At-Arms HP: 45 | Scout HP: 45 | Galley HP: 120 |
|---|
Looking at the statistic blocks, ships are going to be the strongest unit you will have access to during Feudal Age, even their costs are low enough to keep production up from an early point in the game. The terrain will give you access to nearly all your opponents base and if you can position your ships correctly; you can destroy your opponents docks and force them into creation of weaker units once they run out of dockable locations. Even though the early meta of this map is to go for ships, generally players won’t commit to fishing ships due to the fact the map does not have a lot of readily available fish. There are small amounts of box turtles around the map your villagers will have access to, but all the deep fish will be located in the center of the map and even then they’re in limited supply. Players will generally open with a build similar to an archer opening but transition into Docks instead of Archery Ranges. This leaves us with an interesting debate of what way we should go with our docks. Fire Galleys are a strong opener due to their effectiveness against limited numbers of Galleys, as soon as a decent amount of Galleys are on field; they lose their effectiveness. Opening Fire Galleys, then transitioning into Galleys seems to be the key goal of Feudal Age; mixing in some Demolition Rafts once you have the resources. Demolition Rafts are devastating vs your opponents foot soldiers and buildings, make use of them as best you can when you see the opportunities!
Interested in learning more about Demolition Ships? You can checkout our full analysis HERE.
The other option utilized a lot is to get aggressive as early possible, move forward with some villagers and start putting down some aggressive towers. Don’t allow your opponent the chance to transition into docks at all and keep the pressure on. A couple of Militia also work really well to restrict your opponents movement. You can constrict their territory very easily on a map set out like this, then continue to deny Docks.
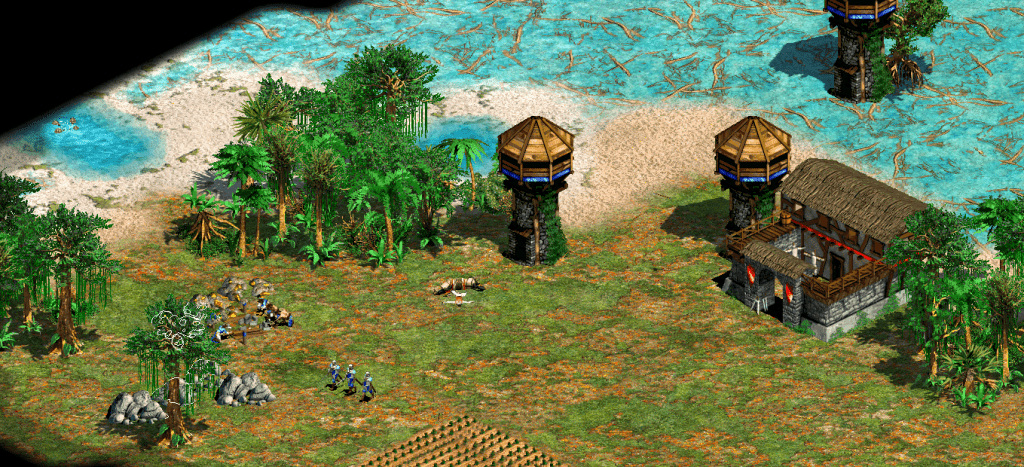
Starting around your TC you’ll have four water Buffalo, they function the same as Cows and still give you 150 food each. There are other water buffalo scattered around the map, these are up to you to find and are not set out in pairs within a radius of the Town Center the way Sheep/Cows are on other maps. You will have the opportunity to find more food across the map you can bring back to your Town Center, but our best advice is to not expect or rely on these bonus Buffalo. To make up for the lack of starting buffalo you will however receive three Rhinos, these function the same as Boar; but are worth 400 food instead. On your starting ‘island’ you will also receive two Gold and Stone piles, one occupying four tiles the other three. There is only a limited amount of resource hidden around the rest of the map, remember to make it all count!

Hopefully that was enough of a run down, we know it was a lot more than we say about most other maps; but this map is a bit of a different story. Later on we may even go into more depth on some of the little things that can really help you take advantage on this map. Until then get out there and Demolition Raft some villagers!
What do you find the most efficient style of play is on this map? Do you play like the TheViper where you’re so aggressive you win the game by 21 minutes with towers and villagers, or do you prefer the long build up then Demoship you’re opponent off the entire map?
Thanks for the post Turkman, I haven’t play enough this map, I’ll give it a chance.